How to De-Ice Your Roof
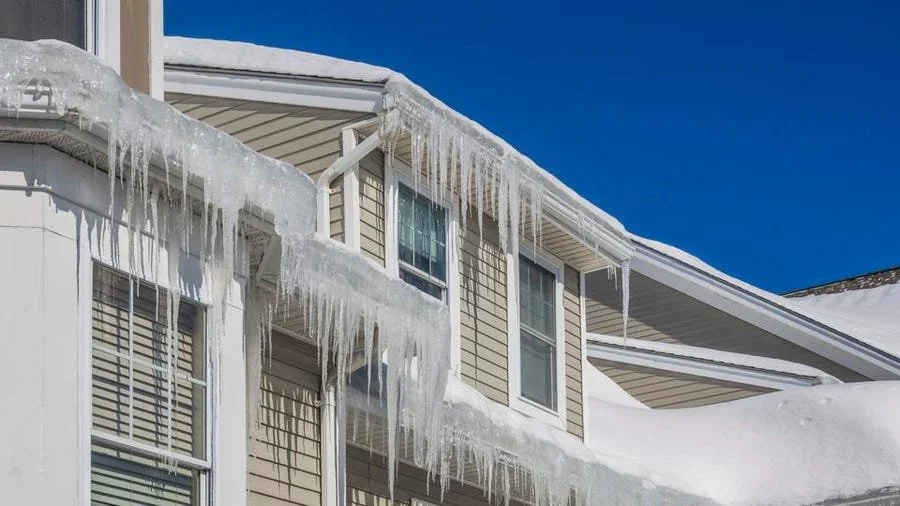
If you live in a cold climate, you may be familiar with the need to de-ice your roof. It’s a good idea to do this every year to prevent ice dams, which can form when snow melts and pools on the roof, then refreezes as it meets the shingles.
In order to de-ice your roof, you can use salt or sand. Sprinkle salt on the snow and water to melt it, or pour sand over top of the ice so it melts quickly. You should also make sure that there’s no snow left on the roof after this process—it can cause leaks later in the year if it melts into your gutters or seeps into your home through small cracks in the roof.
If you’re living in an area that’s prone to snow and ice, the last thing you want is to wake up one morning and find your roof covered in a layer of frost. The cold temperatures can cause damage to your shingles and gutters, making them brittle and susceptible to damage.
Use a Snow Rake
Snow rakes are great tools for removing snow and ice from roofs. They’re designed to be light enough for homeowners to work with, but they’re also durable enough to withstand repeated use and abuse.
As the name suggests, a snow rake is just like any other kind of rake—except it has been modified to remove snow and ice from your roof instead of leaves or twigs from your yard. And if you live in an area where it snows, then this tool is something you can’t do without!
A snow rake is basically just a specialized shovel designed specifically for removing snow from your roof. They come in all different sizes, styles and shapes so shop around until you find one that suits your needs best. Snow rakes can be used to clear away excess buildup from problem areas like downspouts, gutters and all around the edges of a roof. They can also be used to remove crusted ice masses before they get too large.
The best part about using a snow rake is that it’s not nearly as dangerous as climbing up on your roof with an ice pick or shovel – which means you won’t have to worry about falling off your ladder while trying to remove ice dams.
- Advantages: Easy to use, minimizes physical risk.
- Limitations: May not reach all areas of the roof.
How to use a Snow Rake to de-ice your roof:
Step 1: Choose the Right Snow Rake
- Select a Snow Rake: Opt for a snow rake that is lightweight yet durable. It should have an extendable handle to reach the higher areas of your roof.
- Consider Safety Features: Look for a rake with rollers or bumpers to prevent roof damage.
Step 2: Prepare the Area Around Your House
- Clear the Area: Remove any objects around the perimeter of your house that could be damaged by falling snow.
- Safety Precautions: Ensure the area is clear of people and pets to prevent accidents.
Step 3: Position Yourself Safely
- Find Stable Ground: Stand on a flat, stable surface where you have a clear reach of the roof.
- Avoid Using Ladders: Snow raking should be done from the ground to minimize the risk of falls.
Step 4: Start Raking
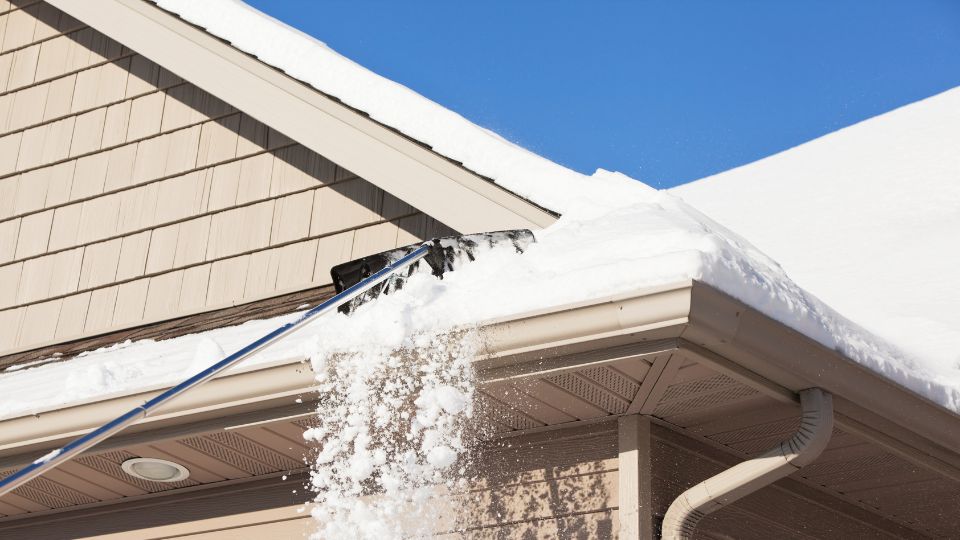
- Begin at the Edge: Start at the edge of the roof and gently pull the rake towards you to drag the snow off the roof.
- Use Downward Strokes: Apply downward strokes instead of pushing upwards to avoid lifting shingles or damaging the roof.
Step 5: Work in Sections
- Methodical Approach: Work in small sections to avoid overexertion and to ensure you’re clearing the snow evenly across the roof.
- Avoid Accumulation: Don’t let too much snow build up on the rake; clear it off regularly.
Step 6: Focus on Problem Areas
- Target Overhangs and Valleys: Pay special attention to roof overhangs and valleys where snow tends to accumulate and ice dams can form.
- Be Gentle: Be careful not to apply too much force in these areas to avoid damaging the roof.
Step 7: Regular Maintenance
- Frequent Clearing: Repeat the process after each significant snowfall to prevent excessive build-up.
- Check for Ice Dams: Regularly inspect for signs of ice dams and clear any developing ridges of ice.
Step 8: Post-Raking Inspection
- Inspect Your Roof: After raking, inspect your roof for any signs of damage or areas that might need repair.
- Clean the Ground Area: Clear the snow debris that has fallen to the ground to maintain safety around your house.
Start from the edge and carefully pull snow towards you, avoiding any forceful contact with the roof.
Use an Ice Pick
The “old-fashioned” way of de-icing is to use an ice pick. This can be hard work and should be undertaken with extreme caution. You’ll need to stand on a ladder for most picking jobs. Always place your ladder against a solid wall and have someone nearby to make sure the feet of the ladder stay put. Using a ladder to access problem areas is an effective way of combating ice dams.
With a gloved hand, and while wearing safety goggles, reach into the interior of downspouts and gutters where ice has built up. Use a moderate amount of force when picking the ice—but not too much! Be patient. Eventually some of the chunks will split, crack and fall away if you are patient enough; some may require more force than others depending on how thick they are or how old they are. Always use caution when picking; make certain not to use too much force! Ice picks are powerful tools with the ability to harm roofs if used incorrectly!
- Effectiveness: High, especially for thick ice.
- Risks: Physically demanding and potentially hazardous.
- Safety Guide: Secure your ladder firmly, have a spotter for stability, and chip away at ice with controlled, moderate force. Wear safety goggles and gloves.

Use Chemical De-Icers
If you’re dealing with ice on your roof, you don’t want to make the problem worse by using the wrong product. Here are some tips for choosing the right ice-melting chemicals:
Take a trip to the hardware store and purchase products for “ice melting.” There are many kinds and a wide variety of prices. Avoid the cheap stuff and stay away from anything that contains calcium chloride or sodium chloride. Those two substances can lead to corrosion, which means you’ll get temporary relief from ice but long-term damage to your roof.
Consider products that do not contain corrosives. Look for crystals, powders or pellets that contain calcium magnesium acetate, ammonium sulfate and combinations of these two chemicals. They work, are not expensive, and most importantly will not cause roof damage. Always make sure to place ice-melting chemicals evenly on problem areas. The “rocky” kinds of chemicals tend to work the fastest, the powdery ones the slowest. If you have a problem with blocks of thick ice, consider purchasing a liquid chemical de-icing product.
- Choice of Products: Opt for environmentally friendly options like calcium magnesium acetate or ammonium sulfate.
- Application: Spread evenly, focusing on problem areas. For thick ice, consider liquid de-icers.
- Environmental Impact: Choose products that are less harmful to the environment.


